

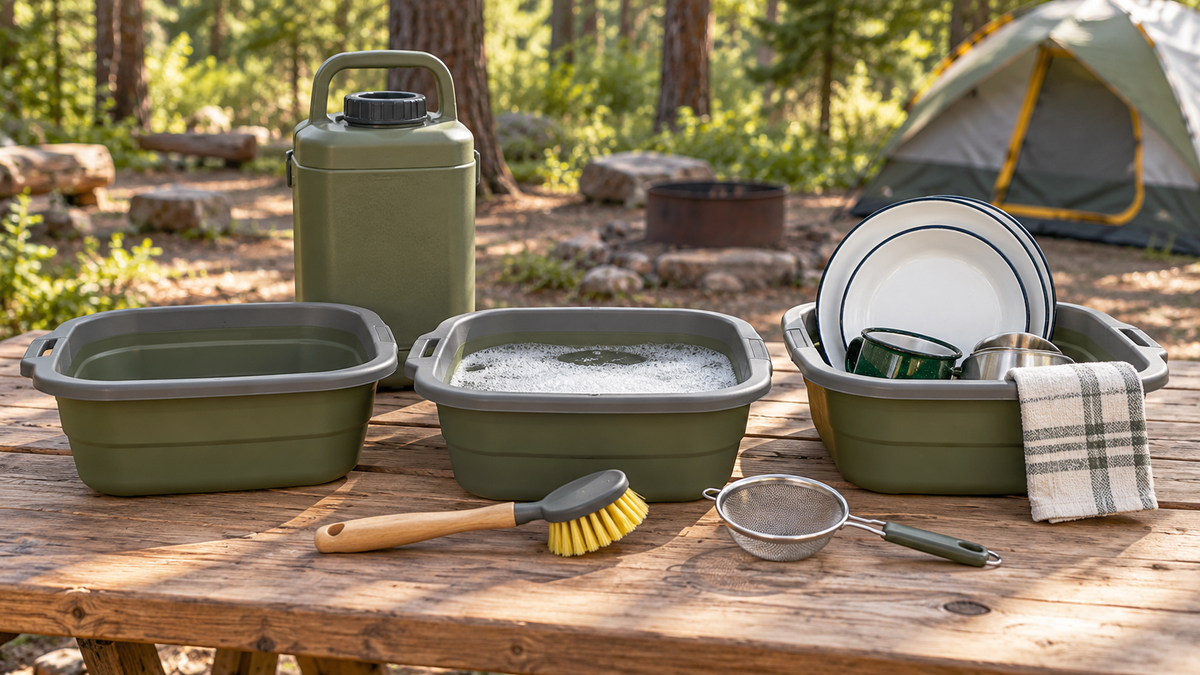
A good camp kitchen plan includes what happens after dinner. Plates need somewhere to wait, clean dishes need a place to dry, and the used water needs an approved destination. Without those details, even a simple meal can leave the picnic table covered in cookware while someone searches for a bucket.
Build your dishwashing kit around the cleanup sequence, then check that sequence against the campground's facilities. This guide focuses on organizing a frontcountry or car-camping setup. Food-service groups and backcountry trips may need different procedures.
Find the cleanup facilities before packing
Check the campground's official information for potable water, designated dishwashing areas and wastewater disposal. These are separate facilities: a drinking-water spigot is not automatically a place to wash dishes, and a restroom sink is not automatically an approved disposal point.
Rules can be specific. For example, Yosemite's campground regulations require camp wastewater to go into designated utility drains. Treat that as an example of why the local rule matters, not a procedure that applies to every campground.
If the website leaves a gap, ask the campground staff before the trip or at check-in. Find out where the station is, whether it will be operating during your stay, and how to handle food scraps. Write the answer beside your meal plan so the whole group follows the same routine.
Choose containers for distinct jobs
Separate the dirty-dish collection area from the clean side. A washable tub can gather used bowls and utensils without leaving them scattered across the table. Choose a size you can carry comfortably and fit into the vehicle, rather than buying the largest basin available.
The National Park Service's camping supply list includes three wash basins, assigning separate roles for washing, rinsing and sanitizing. If that is the method you will use, bring enough containers and follow the applicable food-safety guidance and product directions for each stage. A third tub by itself does not establish a sanitizing process.
Never guess a sanitizer concentration or mix cleaning chemicals. Use only products intended for the job and follow their labels, including contact time and any required rinse. Keep cleaning supplies in their labeled containers and separate from food.
Start by collecting scraps
Put a scraper or suitable utensil and a waste bag beside the dirty-dish area. Remove leftover food before washing, and handle usable leftovers under your normal food-safety plan. Smaller food remnants belong in the waste system, not scattered beneath the picnic table.
Pack a fine-mesh strainer that is practical for your basin. Leave No Trace's waste guidance explains that straining dishwater captures food particles that should be packed out with the trash. It also directs developed-campground visitors to ask their host about the best disposal practice.
Keep the waste bag within reach during cleanup, then put it into the campground's required secure storage or disposal system. A convenient bag hanging from a chair is not necessarily acceptable wildlife storage.
Give the clean side enough space
Before adding water, lay out the entire sequence on a stable surface: dirty dishes, the required cleaning stages, and a clean drying area. If the table is too crowded, reduce the number of items in use or work in smaller batches. Do not balance a full basin on the table's edge.
Choose a rack or other drying arrangement suited to your dishes and the available space. Keep clean utensils away from the dirty collection tub, used scrubbers and food waste. Follow the relevant sanitizing directions for drying and handling before putting dishes away.
Check the largest pot against the basin at home. A basin that fits dinner plates may be awkward for a long pan handle. That does not necessarily mean you need more gear; changing the menu or choosing a smaller cooking pot can simplify the whole cleanup.
Plan the water journey both ways
Pack a clean container suitable for carrying potable water, plus an appropriate way to contain and carry wastewater if the facilities require it. Make the two containers unmistakably different. Keep the drinking-water container out of the dirty-dish sequence.
Carry manageable amounts and keep the route clear. Follow the basin manufacturer's temperature limits, and avoid carrying dangerously hot water. Where water is limited, include cleaning in the trip's water plan rather than budgeting only for drinks and cooking.
Do not pour dishwater into a lake, stream, storm drain or beside the tent. Biodegradable soap is still not permission to wash in natural water. Leave No Trace notes that even biodegradable soap can affect water quality; local campground disposal instructions remain the deciding factor. If disposal requires packing wastewater out, plan a suitable container before leaving home.
Pack a kit you can reset
- Containers appropriate to the campground's cleanup method
- Potable-water container and any needed wastewater container
- Scraper, dish brush or suitable scrubber, and fine-mesh strainer
- Labeled dishwashing supplies and any required sanitizing supplies
- Clean drying arrangement, waste bags and approved storage
- A short note identifying the actual wash and disposal locations
Try the arrangement with one ordinary meal at home. Notice what is awkward to carry, what drips and where clean items end up. After camping, clean and dry the kit before storage, then restock it during your post-trip gear reset. An orderly cleanup is easier to repeat than a pile of loosely related kitchen accessories.
Cover: original conceptual dishwashing-kit image, not a demonstration of a particular sanitizing method.


 Tents & Shelter
 Sleep Systems
 Packs & Hiking
 Camp Kitchen
 Light & Power
 Survival & Skills
 Camping 101
 Fishing