

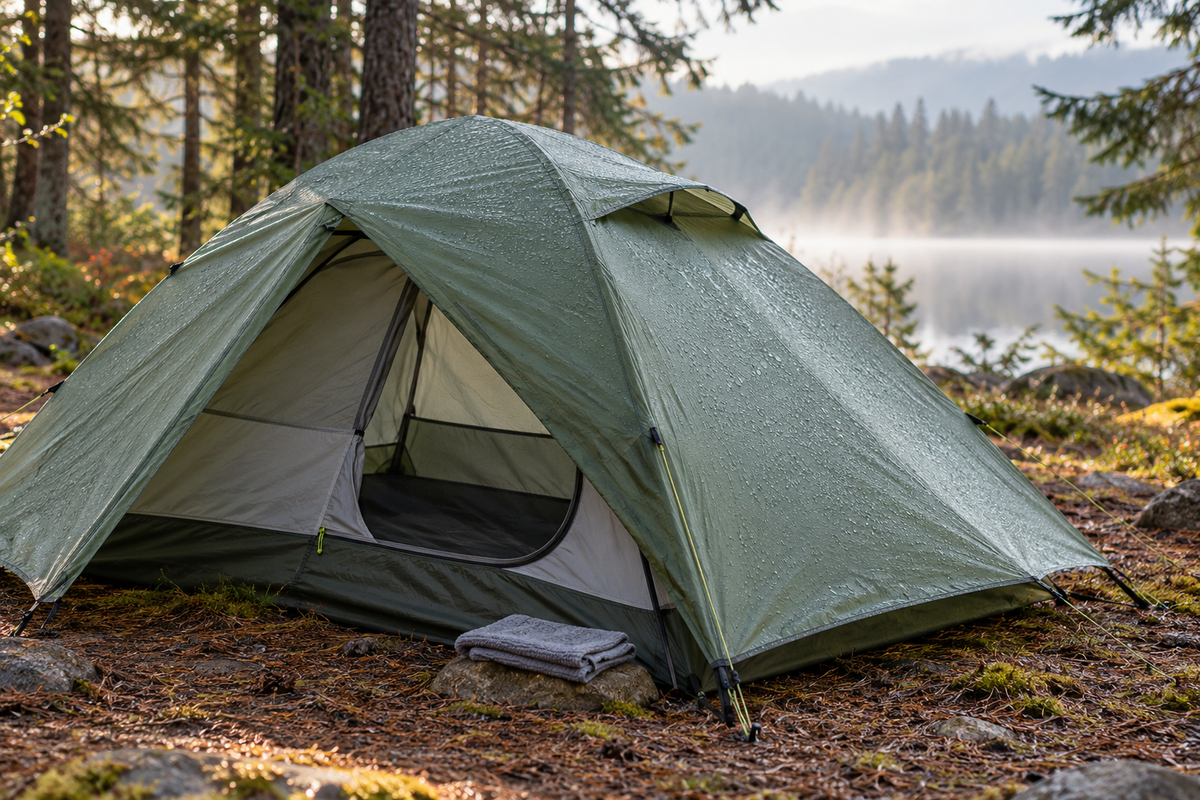
A damp tent wall does not immediately tell you that your shelter has failed. Water can collect inside through condensation, enter through an opening, or come through damaged fabric or a seam. More than one of those things can happen on the same night.
Before buying a replacement tent or covering the fly in sealant, gather a few useful observations. The aim is to narrow the problem and choose the right next step, without pretending that one wet patch provides a complete diagnosis.
Start with where and when the water appeared
Note whether it rained, how many people occupied the tent, whether wet gear was inside and when you first noticed moisture. Photograph the affected area before wiping it away, if you can do so without letting your sleeping equipment get wetter.
Describe the pattern precisely: droplets across the underside of the fly, one recurring drip beside a seam, a damp patch where bedding touched the wall, or water near the doorway. Include a wider photograph showing the location. “Wet near the rear corner after overnight rain” gives a manufacturer much more to work with than “not waterproof.”
These are clues. Widespread droplets can fit condensation, while a repeated localized entry point deserves closer inspection, but neither pattern rules out another cause.
Understand why a dry night can still mean a wet fly
MSR's condensation guidance identifies weather, moisture from occupants, wet ground and wet equipment as contributors. Warm, moist air meeting a cooler surface can leave water on the fabric even without rain passing through it.
A double-wall design gives moisture a route through the breathable inner toward the fly, but no tent design eliminates condensation. Keeping every opening closed can limit that moisture's route out. Conversely, opening a door into wind-driven rain can introduce a different problem. Use the shelter's designed vents and weather-appropriate configurations.
A new tent therefore cannot promise a completely dry interior in all conditions. Understanding the moisture pattern is useful even if you eventually decide that another design better suits your trips.
Check the pitch against the actual instructions
In suitable weather, walk around the tent and compare it with the manufacturer's setup directions. Confirm that the fly is correctly oriented, attachment points are connected, vents are propped as intended and the fly has its designed separation from the inner.
MSR recommends using vents for airflow and properly guying the fly away from the body. Follow your own tent's tensioning method rather than pulling every strap as hard as possible. Also check that bags or bedding are not pressing the inner against wet fabric.
Look at doors and storm flaps. Were they fully closed when rain arrived? Did water enter while someone climbed in? Check the footprint arrangement against its instructions, too. Photograph anything that looks different from the manual before changing it, so your notes preserve the original setup.
Reduce the moisture you bring inside
Where conditions and the tent's instructions allow, keep wet outerwear out of the sleeping compartment and maintain the intended ventilation. Plan a place for damp equipment before bedtime rather than piling it against a wall.
Use a small absorbent cloth to manage accessible droplets gently, keeping sleeping insulation away from wet surfaces. Treat this as moisture management while you investigate. It is not a repair to fabric, a seam or the waterproof coating.
If you cannot keep your sleep system adequately dry and warm, change the plan or leave for suitable shelter. Do not let a gear experiment become a reason to remain in deteriorating conditions.
Inspect a clean, dry tent at home
Once the shelter is dry, examine the exact area identified in your notes. Look for punctures, abrasion, loose or peeling seam tape, and obvious changes to the coating. Check both accessible sides without scraping or stretching the fabric.
MSR's explanation of seam taping and seam sealing describes how construction differs between tents and how tape can deteriorate with time and exposure. That is a reason to identify the construction before choosing a repair product.
Ask the tent maker about an approved leak-check method when the cause remains unclear. Send the model, age, photographs, weather notes and a description of any previous treatment. Follow its procedure rather than using a pressure washer, harsh cleaner or improvised soaking test.
Choose the next step from the evidence
- Moisture improves with correct pitching and ventilation: keep the improved routine and continue observing on later trips.
- Water repeatedly enters at an identifiable defect: request the maker's repair guidance, including material compatibility and drying or curing time.
- The fabric or coating has widespread damage: ask whether repair is practical before buying supplies.
- The cause remains uncertain: keep the tent out of trips where failure would have serious consequences until it is assessed.
Finish with proper drying and storage. Our post-trip gear reset helps keep the shelter, sleeping equipment and unfinished repairs from disappearing into a closed tote. A clear moisture record gives you a better basis for repair, continued use or replacement than one uncomfortable morning alone.
Cover: an original editorial illustration, not a photograph of a specific product.


 Tents & Shelter
 Sleep Systems
 Packs & Hiking
 Camp Kitchen
 Light & Power
 Survival & Skills
 Camping 101
 Fishing